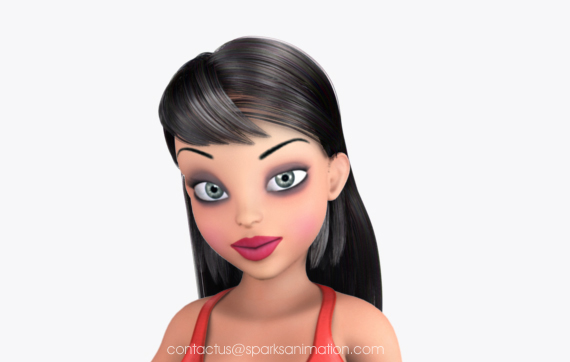
Here is simple work flow to create a real looking hair with a fast render time using p_hairTK Shader
And mentalray in maya
Download and install the p_shader from the below link , follow the instruction in the documentation available in archive for an easy installation
http://www.puppet.tfdv.com/
Get ready with your character and hair system

Now let’s start the shading part of hair.
First you need to crate a polygon/nurbs cube(any object) in respect to the mesh you have generated the hair. and instance of the three shaders : p_HairTK (Material), p_


Geometry shaders, like p_shader_replacer, are actually less like shaders and more like plugins which enable access to features with in mentalray that maya cant normally get to. You don't assign a geometry shader to a surface like you normally would. Instead you hook it onto a piece of geometry using a slot in the transform node. This host geometry can be a simple poly or nurbs surface. It will not be visible in a render. It's only purpose is to be a place to plug in the geometry shader.
Select the cube and go to attribute editor, under mentalray tab .enable geometry shader .

connect the p_shader_replacer to the geometry shader (drag and drop the p_shader replacer to the geometry shader Slot)

Remember, the sole purpose of this cube is to hold the geometry shader. With the geometry shader connected ,the cube will not be visible in the render, but geometrycube must remain visible in the scene otherwise geometry shader will be ignored at render time
Now select the p_HairTK shader in hypershade and explore the input output connections .

Select p_HairTK1SG ,and connect p_HairTK_shadow to the shadow shader slot .

Now select the p_shader_replacer utilitie we created and connect the p_HairTK1SG node in the material (shading group) slot
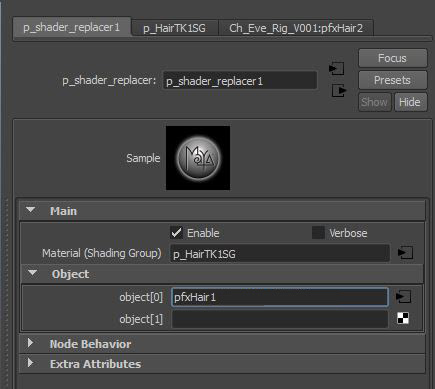
and enter the name of fur feedback in object slot

and here are some render and shadow settings i have used and the details of shader tweak
Render Settings

Shadow Settings

Shader Tweak

If you need to take an occlusion of character and hair together you can just
Connect mib_amb_occlusion1 to the out color node of a surface shader then plug
surfaceShader1SG to the Material slot of p_shader_replacer1 same way as we did for the color
enable ray tracing and render .

and here is a simple diagram for a better understanding..


No comments:
Post a Comment